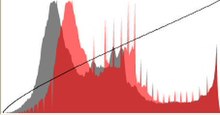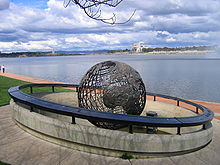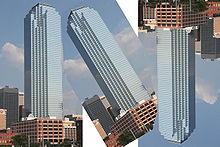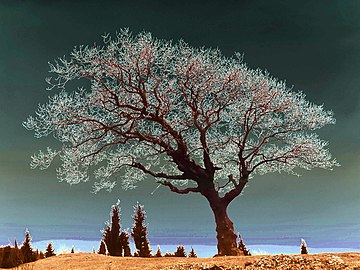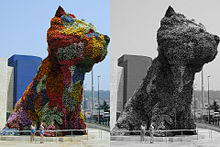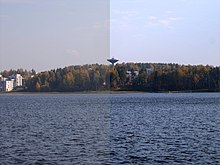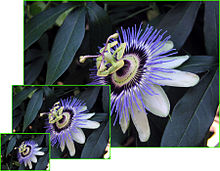
Gamma correction or gamma is a nonlinear operation used to encode and decode luminance or tristimulus values in video or still image systems. Gamma correction is, in the simplest cases, defined by the following power-law expression:
where the non-negative real input value is raised to the power and multiplied by the constant A to get the output value . In the common case of A = 1, inputs and outputs are typically in the range 0–1.
A gamma value is sometimes called an encoding gamma, and the process of encoding with this compressive power-law nonlinearity is called gamma compression; conversely, a gamma value is called a decoding gamma, and the application of the expansive power-law nonlinearity is called gamma expansion.
Explanation
Gamma encoding of images is used to optimize the usage of bits when encoding an image, or bandwidth used to transport an image, by taking advantage of the non-linear manner in which humans perceive light and color. The human perception of brightness (lightness), under common illumination conditions (neither pitch black nor blindingly bright), follows an approximate power function (which has no relation to the gamma function), with greater sensitivity to relative differences between darker tones than between lighter tones, consistent with the Stevens power law for brightness perception. If images are not gamma-encoded, they allocate too many bits or too much bandwidth to highlights that humans cannot differentiate, and too few bits or too little bandwidth to shadow values that humans are sensitive to and would require more bits/bandwidth to maintain the same visual quality. Gamma encoding of floating-point images is not required (and may be counterproductive), because the floating-point format already provides a piecewise linear approximation of a logarithmic curve.
Although gamma encoding was developed originally to compensate for the brightness characteristics of cathode-ray tube (CRT) displays, that is not its main purpose or advantage in modern systems. In CRT displays, the light intensity varies nonlinearly with the electron-gun voltage. Altering the input signal by gamma compression can cancel this nonlinearity, such that the output picture has the intended luminance. However, the gamma characteristics of the display device do not play a factor in the gamma encoding of images and video. They need gamma encoding to maximize the visual quality of the signal, regardless of the gamma characteristics of the display device. The similarity of CRT physics to the inverse of gamma encoding needed for video transmission was a combination of coincidence and engineering, which simplified the electronics in early television sets.
Photographic film has a much greater ability to record fine differences in shade than can be reproduced on photographic paper. Similarly, most video screens are not capable of displaying the range of brightnesses (dynamic range) that can be captured by typical electronic cameras. For this reason, considerable artistic effort is invested in choosing the reduced form in which the original image should be presented. The gamma correction, or contrast selection, is part of the photographic repertoire used to adjust the reproduced image.
Analogously, digital cameras record light using electronic sensors that usually respond linearly. In the process of rendering linear raw data to conventional RGB data (e.g. for storage into JPEG image format), color space transformations and rendering transformations will be performed. In particular, almost all standard RGB color spaces and file formats use a non-linear encoding (a gamma compression) of the intended intensities of the primary colors of the photographic reproduction. In addition, the intended reproduction is almost always nonlinearly related to the measured scene intensities, via a tone reproduction nonlinearity.
Generalized gamma
The concept of gamma can be applied to any nonlinear relationship. For the power-law relationship , the curve on a log–log plot is a straight line, with slope everywhere equal to gamma (slope is represented here by the derivative operator):
That is, gamma can be visualized as the slope of the input–output curve when plotted on logarithmic axes. For a power-law curve, this slope is constant, but the idea can be extended to any type of curve, in which case gamma (strictly speaking, "point gamma") is defined as the slope of the curve in any particular region.
Film photography
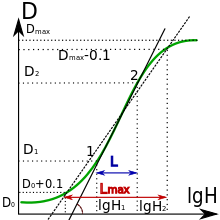
When a photographic film is exposed to light, the result of the exposure can be represented on a graph showing log of exposure on the horizontal axis, and density, or negative log of transmittance, on the vertical axis. For a given film formulation and processing method, this curve is its characteristic or Hurter–Driffield curve. Since both axes use logarithmic units, the slope of the linear section of the curve is called the gamma of the film. Negative film typically has a gamma less than 1; positive film (slide film, reversal film) typically has a gamma with absolute value greater than 1.
Standard gammas
Analog TV
Output to CRT-based television receivers and monitors does not usually require further gamma correction. The standard video signals that are transmitted or stored in image files incorporate gamma compression matching the gamma expansion of the CRT (although it is not the exact inverse). For television signals, gamma values are fixed and defined by the analog video standards. CCIR System M and N, associated with NTSC color, use gamma 2.2; systems B/G, H, I, D/K, K1, L and M associated with PAL or SECAM color use gamma 2.8.
Computer displays
In most computer display systems, images are encoded with a gamma of about 0.45 and decoded with the reciprocal gamma of 2.2. A notable exception, until the release of Mac OS X 10.6 (Snow Leopard) in September 2009, were Macintosh computers, which encoded with a gamma of 0.55 and decoded with a gamma of 1.8. In any case, binary data in still image files (such as JPEG) are explicitly encoded (that is, they carry gamma-encoded values, not linear intensities), as are motion picture files (such as MPEG). The system can optionally further manage both cases, through color management, if a better match to the output device gamma is required.
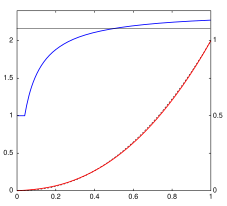
The sRGB color space standard used with most cameras, PCs, and printers does not use a simple power-law nonlinearity as above, but has a decoding gamma value near 2.2 over much of its range, as shown in the plot to the right/above. Below a compressed value of 0.04045 or a linear intensity of 0.00313, the curve is linear (encoded value proportional to intensity), so γ = 1. The dashed black curve behind the red curve is a standard γ = 2.2 power-law curve, for comparison.
Gamma correction in computers is used, for example, to display a gamma = 1.8 Apple picture correctly on a gamma = 2.2 PC monitor by changing the image gamma. Another usage is equalizing of the individual color-channel gammas to correct for monitor discrepancies.
Gamma meta information
Some picture formats allow an image's intended gamma (of transformations between encoded image samples and light output) to be stored as metadata, facilitating automatic gamma correction. The PNG specification includes the gAMA chunk for this purpose and with formats such as JPEG and TIFF the Exif Gamma tag can be used. Some formats can specify the ICC profile which includes a transfer function.
These features have historically caused problems, especially on the web. For HTML and CSS colors and JPG or GIF images without attached color profile metadata, popular browsers passed numerical color values to the display without color management, resulting in substantially different appearance between devices; however those same browsers sent images with gamma explicitly set in metadata through color management, and also applied a default gamma to PNG images with metadata omitted. This made it impossible for PNG images to simultaneously match HTML or untagged JPG colors on every device. This situation has since improved, as most major browsers now support the gamma setting (or lack of it).
Power law for video display
A gamma characteristic is a power-law relationship that approximates the relationship between the encoded luma in a television system and the actual desired image luminance.
With this nonlinear relationship, equal steps in encoded luminance correspond roughly to subjectively equal steps in brightness. Ebner and Fairchild used an exponent of 0.43 to convert linear intensity into lightness (luma) for neutrals; the reciprocal, approximately 2.33 (quite close to the 2.2 figure cited for a typical display subsystem), was found to provide approximately optimal perceptual encoding of grays.
The following illustration shows the difference between a scale with linearly-increasing encoded luminance signal (linear gamma-compressed luma input) and a scale with linearly-increasing intensity scale (linear luminance output).
| Linear encoding | VS = | 0.0 | 0.1 | 0.2 | 0.3 | 0.4 | 0.5 | 0.6 | 0.7 | 0.8 | 0.9 | 1.0 |
| Linear intensity | I = | 0.0 | 0.1 | 0.2 | 0.3 | 0.4 | 0.5 | 0.6 | 0.7 | 0.8 | 0.9 | 1.0 |
On most displays (those with gamma of about 2.2), one can observe that the linear-intensity scale has a large jump in perceived brightness between the intensity values 0.0 and 0.1, while the steps at the higher end of the scale are hardly perceptible. The gamma-encoded scale, which has a nonlinearly-increasing intensity, will show much more even steps in perceived brightness.
A CRT, for example, converts a video signal to light in a nonlinear way, because the electron gun's intensity (brightness) as a function of applied video voltage is nonlinear. The light intensity I is related to the source voltage Vs according to
where γ is the Greek letter gamma. For a CRT, the gamma that relates brightness to voltage is usually in the range 2.35 to 2.55; video look-up tables in computers usually adjust the system gamma to the range 1.8 to 2.2, which is in the region that makes a uniform encoding difference give approximately uniform perceptual brightness difference, as illustrated in the diagram at the top of this section.
For simplicity, consider the example of a monochrome CRT. In this case, when a video signal of 0.5 (representing a mid-gray) is fed to the display, the intensity or brightness is about 0.22 (resulting in a mid-gray, about 22% the intensity of white). Pure black (0.0) and pure white (1.0) are the only shades that are unaffected by gamma.
To compensate for this effect, the inverse transfer function (gamma correction) is sometimes applied to the video signal so that the end-to-end response is linear. In other words, the transmitted signal is deliberately distorted so that, after it has been distorted again by the display device, the viewer sees the correct brightness. The inverse of the function above is
where Vc is the corrected voltage, and Vs is the source voltage, for example, from an image sensor that converts photocharge linearly to a voltage. In our CRT example 1/γ is 1/2.2 ≈ 0.45.
A color CRT receives three video signals (red, green, and blue) and in general each color has its own value of gamma, denoted γR, γG or γB. However, in simple display systems, a single value of γ is used for all three colors.
Other display devices have different values of gamma: for example, a Game Boy Advance display has a gamma between 3 and 4 depending on lighting conditions. In LCDs such as those on laptop computers, the relation between the signal voltage Vs and the intensity I is very nonlinear and cannot be described with gamma value. However, such displays apply a correction onto the signal voltage in order to approximately get a standard γ = 2.5 behavior. In NTSC television recording, γ = 2.2.
The power-law function, or its inverse, has a slope of infinity at zero. This leads to problems in converting from and to a gamma colorspace. For this reason most formally defined colorspaces such as sRGB will define a straight-line segment near zero and add raising x + K (where K is a constant) to a power so the curve has continuous slope. This straight line does not represent what the CRT does, but does make the rest of the curve more closely match the effect of ambient light on the CRT. In such expressions the exponent is not the gamma; for instance, the sRGB function uses a power of 2.4 in it, but more closely resembles a power-law function with an exponent of 2.2, without a linear portion.
Methods to perform display gamma correction in computing
Up to four elements can be manipulated in order to achieve gamma encoding to correct the image to be shown on a typical 2.2- or 1.8-gamma computer display:
- The pixel's intensity values in a given image file; that is, the binary pixel values are stored in the file in such way that they represent the light intensity via gamma-compressed values instead of a linear encoding. This is done systematically with digital video files (as those in a DVD movie), in order to minimize the gamma-decoding step while playing, and maximize image quality for the given storage. Similarly, pixel values in standard image file formats are usually gamma-compensated, either for sRGB gamma (or equivalent, an approximation of typical of legacy monitor gammas), or according to some gamma specified by metadata such as an ICC profile. If the encoding gamma does not match the reproduction system's gamma, further correction may be done, either on display or to create a modified image file with a different profile.
- The rendering software writes gamma-encoded pixel binary values directly to the video memory (when highcolor/truecolor modes are used) or in the CLUT hardware registers (when indexed color modes are used) of the display adapter. They drive digital-to-analog converters (DAC) which output the proportional voltages to the display. For example, when using 24-bit RGB color (8 bits per channel), writing a value of 128 (rounded midpoint of the 0–255 byte range) in video memory it outputs the proportional ≈ 0.5 voltage to the display, which it is shown darker due to the monitor behavior. Alternatively, to achieve ≈ 50% intensity, a gamma-encoded look-up table can be applied to write a value near to 187 instead of 128 by the rendering software.
- Modern display adapters have dedicated calibrating CLUTs, which can be loaded once with the appropriate gamma-correction look-up table in order to modify the encoded signals digitally before the DACs that output voltages to the monitor. Setting up these tables to be correct is called hardware calibration.
- Some modern monitors allow the user to manipulate their gamma behavior (as if it were merely another brightness/contrast-like setting), encoding the input signals by themselves before they are displayed on screen. This is also a calibration by hardware technique but it is performed on the analog electric signals instead of remapping the digital values, as in the previous cases.
In a correctly calibrated system, each component will have a specified gamma for its input and/or output encodings. Stages may change the gamma to correct for different requirements, and finally the output device will do gamma decoding or correction as needed, to get to a linear intensity domain. All the encoding and correction methods can be arbitrarily superimposed, without mutual knowledge of this fact among the different elements; if done incorrectly, these conversions can lead to highly distorted results, but if done correctly as dictated by standards and conventions will lead to a properly functioning system.
In a typical system, for example from camera through JPEG file to display, the role of gamma correction will involve several cooperating parts. The camera encodes its rendered image into the JPEG file using one of the standard gamma values such as 2.2, for storage and transmission. The display computer may use a color management engine to convert to a different color space (such as older Macintosh's γ = 1.8 color space) before putting pixel values into its video memory. The monitor may do its own gamma correction to match the CRT gamma to that used by the video system. Coordinating the components via standard interfaces with default standard gamma values makes it possible to get such system properly configured.
Simple monitor tests

This procedure is useful for making a monitor display images approximately correctly, on systems in which profiles are not used (for example, the Firefox browser prior to version 3.0 and many others) or in systems that assume untagged source images are in the sRGB colorspace.
In the test pattern, the intensity of each solid color bar is intended to be the average of the intensities in the surrounding striped dither; therefore, ideally, the solid areas and the dithers should appear equally bright in a system properly adjusted to the indicated gamma.
Normally a graphics card has contrast and brightness control and a transmissive LCD monitor has contrast, brightness, and backlight control. Graphics card and monitor contrast and brightness have an influence on effective gamma, and should not be changed after gamma correction is completed.
The top two bars of the test image help to set correct contrast and brightness values. There are eight three-digit numbers in each bar. A good monitor with proper calibration shows the six numbers on the right in both bars, a cheap monitor shows only four numbers.
Given a desired display-system gamma, if the observer sees the same brightness in the checkered part and in the homogeneous part of every colored area, then the gamma correction is approximately correct. In many cases the gamma correction values for the primary colors are slightly different.
Setting the color temperature or white point is the next step in monitor adjustment.
Before gamma correction the desired gamma and color temperature should be set using the monitor controls. Using the controls for gamma, contrast and brightness, the gamma correction on an LCD can only be done for one specific vertical viewing angle, which implies one specific horizontal line on the monitor, at one specific brightness and contrast level. An ICC profile allows one to adjust the monitor for several brightness levels. The quality (and price) of the monitor determines how much deviation of this operating point still gives a satisfactory gamma correction. Twisted nematic (TN) displays with 6-bit color depth per primary color have lowest quality. In-plane switching (IPS) displays with typically 8-bit color depth are better. Good monitors have 10-bit color depth, have hardware color management and allow hardware calibration with a tristimulus colorimeter. Often a 6bit plus FRC panel is sold as 8bit and a 8bit plus FRC panel is sold as 10bit. FRC is no true replacement for more bits. The 24-bit and 32-bit color depth formats have 8 bits per primary color.
With Microsoft Windows 7 and above the user can set the gamma correction through the display color calibration tool dccw.exe or other programs. These programs create an ICC profile file and load it as default. This makes color management easy. Increase the gamma slider in the dccw program until the last colored area, often the green color, has the same brightness in checkered and homogeneous area. Use the color balance or individual colors gamma correction sliders in the gamma correction programs to adjust the two other colors. Some old graphics card drivers do not load the color Look Up Table correctly after waking up from standby or hibernate mode and show wrong gamma. In this case update the graphics card driver.
On some operating systems running the X Window System, one can set the gamma correction factor (applied to the existing gamma value) by issuing the command xgamma -gamma 0.9 for setting gamma correction factor to 0.9, and xgamma for querying current value of that factor (the default is 1.0). In macOS systems, the gamma and other related screen calibrations are made through the System Preferences.
Scaling and blending
Generally, operations on pixel values should be performed in "linear light" (gamma 1). Eric Brasseur discusses the issue at length and provides test images. They serve to point out a widespread problem: Many programs perform scaling in a color space with gamma, instead of a physically correct linear space. The test images are constructed so as to have a drastically different appearance when downsampled incorrectly. Jonas Berlin has created a "your scaling software sucks/rules" image based on this principle.
In addition to scaling, the problem also applies to other forms of downsampling (scaling down), such as chroma subsampling in JPEG's gamma-enabled Y′CbCr. WebP solves this problem by calculating the chroma averages in linear space then converting back to a gamma-enabled space; an iterative solution is used for larger images. The same sharp YUV (formerly smart YUV) code is used in sjpeg and optionally in AVIF. Kornelski provides a simpler approximation by luma-based weighted average. Alpha compositing, color gradients, and 3D rendering are also affected by this issue.
Paradoxically, when upsampling (scaling up) an image, the result processed in a "wrong" (non-physical) gamma color space is often more aesthetically pleasing. This is because resampling filters with negative lobes like Mitchell–Netravali and Lanczos create ringing artifacts linearly even though human perception is non-linear and better approximated by gamma. (Emulating "stepping back," which motivates downsampling in linear light (gamma=1), does not apply when upsampling.) A related method of reducing the visibility of ringing artifacts consists of using a sigmoidal light transfer function as pioneered by ImageMagick and GIMP's LoHalo filter and adapted to video upsampling by madVR, AviSynth and Mpv.
Terminology
The term intensity refers strictly to the amount of light that is emitted per unit of time and per unit of surface, in units of lux. Note, however, that in many fields of science this quantity is called luminous exitance, as opposed to luminous intensity, which is a different quantity. These distinctions, however, are largely irrelevant to gamma compression, which is applicable to any sort of normalized linear intensity-like scale.
"Luminance" can mean several things even within the context of video and imaging:
- luminance is the photometric brightness of an object (in units of cd/m2), taking into account the wavelength-dependent sensitivity of the human eye (the photopic curve);
- relative luminance is the luminance relative to a white level, used in a color-space encoding;
- luma is the encoded video brightness signal, i.e., similar to the signal voltage VS.
One contrasts relative luminance in the sense of color (no gamma compression) with luma in the sense of video (with gamma compression), and denote relative luminance by Y and luma by Y′, the prime symbol (′) denoting gamma compression. Note that luma is not directly calculated from luminance, it is the (somewhat arbitrary) weighted sum of gamma compressed RGB components.
Likewise, brightness is sometimes applied to various measures, including light levels, though it more properly applies to a subjective visual attribute.
Gamma correction is a type of power law function whose exponent is the Greek letter gamma (γ). It should not be confused with the mathematical Gamma function. The lower case gamma, γ, is a parameter of the former; the upper case letter, Γ, is the name of (and symbol used for) the latter (as in Γ(x)). To use the word "function" in conjunction with gamma correction, one may avoid confusion by saying "generalized power law function".
Without context, a value labeled gamma might be either the encoding or the decoding value. Caution must be taken to correctly interpret the value as that to be applied-to-compensate or to be compensated-by-applying its inverse. In common parlance, in many occasions the decoding value (as 2.2) is employed as if it were the encoding value, instead of its inverse (1/2.2 in this case), which is the real value that must be applied to encode gamma.


